
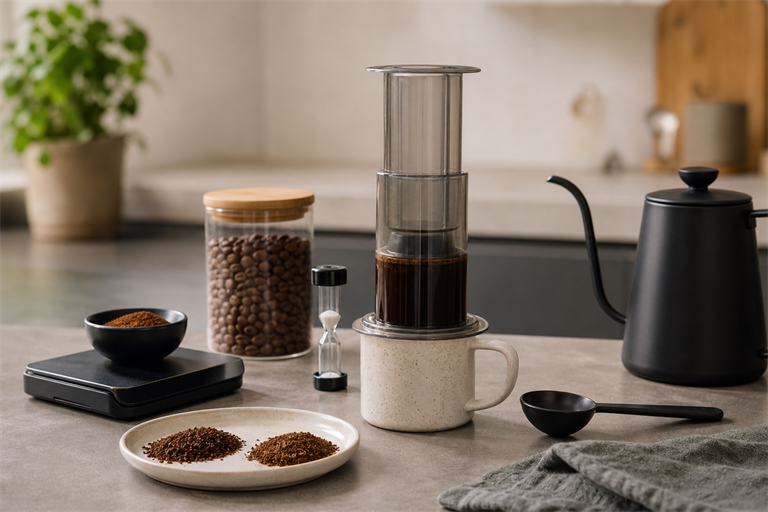
A sour, thin AeroPress can be consistent with relatively low extraction, but sourness is not proof of one cause. Some coffees are naturally bright, and serving temperature changes perception. Treat taste as a clue: keep the dose and water fixed, change one brewing variable, and compare the next cup.
The fastest reliable sequence is to confirm complete wetting, move the grind slightly finer, then test a modestly longer contact time or higher water temperature. Stop as soon as sweetness and body improve without an unwanted dry or bitter finish.
Sour, bright, weak or bitter?
| What the cup tastes like | Likely direction | First check |
|---|---|---|
| Sharp or sour and also thin | Extraction may be low | Grind slightly finer while holding everything else fixed |
| Pleasant citrus or fruit with sweetness | May be the coffee’s intended acidity | Let the cup cool and decide whether it is actually unbalanced |
| Watery but not especially sour | Strength may be low | Check dose and final beverage volume before changing extraction |
| Dry, harsh or strongly bitter | The previous adjustment may have gone too far | Reverse the last change |
| Flat aroma with papery flavor | Coffee age or storage may be involved | Test a recently opened coffee with the same recipe |
Avoid the common “acids first, sugars second, bitterness last” explanation. Coffee contains many compounds that dissolve at interacting rates, and sensory balance is not a simple three-stage extraction clock.
Reset with the official AeroPress starting method
When a recipe has accumulated too many changes, return to a documented baseline. The manufacturer’s current AeroPress Signature Brew instructions for freshly ground coffee use:
- 16–18 g of medium-fine coffee
- 85°C / 185°F water for the published starting recipe
- The standard upright position on a sturdy mug
- Water to the number 4 mark
- A gentle three-second stir
- The plunger inserted slightly and pulled up to stop drip-through
- A 30-second wait, followed by gentle, constant pressing
This is a baseline, not the only valid AeroPress recipe. It is useful because it removes avoidable variables and follows the manufacturer’s current handling instructions.
Fix 1: move the grind slightly finer
AeroPress’s official grind guide recommends medium-fine as the starting point: finer than ordinary drip coffee but coarser than true espresso. A finer grind exposes more surface area and generally increases extraction rate, but too fine a grind can make pressing difficult and introduce more fines.
- Keep coffee dose, water amount, temperature, stir and contact time unchanged.
- Move one small grinder step finer.
- Brew and taste after the drink has cooled enough to evaluate comfortably.
- If sweetness and body improve, keep the new setting. If pressing becomes difficult or the finish turns harsh, move back.
Grinder numbers are only starting points. Burr calibration, wear, bean density and the individual recipe can make the same numbered setting behave differently on two grinders.
Fix 2: confirm that all grounds are wet
Dry clumps reduce effective contact between coffee and water. Before adding more heat or time, make sure the bed is level, pour steadily, and use the brief gentle stir in the official method. Aggressive repeated stirring is not automatically better; it changes extraction and may move more fine particles toward the filter.
If water runs through unusually quickly in the standard position, insert the plunger shortly after stirring and pull upward slightly. AeroPress recommends this vacuum technique to limit drip-through during the wait.
Fix 3: extend contact time in small steps
More time can increase extraction, but it should be tested separately from grind. Add 15–30 seconds to the wait, brew again, and compare. If the cup improves, keep the longer time. If it becomes dry or dull, return to the previous time.
Do not change grind, temperature and steep time together. A better cup would provide no evidence about which change helped, and a worse cup would be equally difficult to diagnose.
Fix 4: test a higher water temperature
Temperature changes extraction rate, but “hotter is always better” is not a sound rule. AeroPress currently recommends 85°C as a starting point for medium and light roasts and 80°C / 175°F for dark roasts in its official FAQ. Other recipes use hotter water successfully.
If the grind and wetting are controlled and the cup remains sour and thin, raise the temperature by a small, measured amount and compare. A temperature-controlled kettle is preferable because “wait 30 seconds after boiling” does not produce the same temperature in every kettle, room or water volume.
Research on drip coffee also cautions against simple temperature-to-flavor claims. A controlled sensory study found little difference among 87°C, 90°C and 93°C brews when strength and extraction yield were held constant. That study was not an AeroPress experiment, but it shows why temperature should be treated as one variable rather than a guaranteed sourness cure.
Fix 5: separate strength from extraction
A concentrated coffee can still be under-extracted, and a well-extracted coffee can still taste weak. If the cup is watery without sharp sourness, confirm how much coffee and water were used. Tightening the coffee-to-water ratio increases concentration, but it does not automatically correct an extraction problem.
Use a scale if repeatability matters. Record dry coffee mass and water mass rather than relying on a different scoop or fill level each time.
Should you use the inverted AeroPress method?
The inverted method places the brewer upside down during steeping. Its purpose is to prevent premature drip-through and permit longer contact times or coarser grinds. It is not required to fix sour coffee.
AeroPress now strongly discourages the inverted method because the setup is less stable and a mishap can expose the user to hot liquid. The manufacturer recommends the standard orientation with the plunger seal inserted about half an inch and pulled upward to stop dripping. Its Flow Control Filter Cap is another compatible option for limiting drip-through.
If an older recipe calls for inversion, understand its intent and choose the safer standard-position technique instead.
A one-variable troubleshooting plan
| Brew | Change | Keep fixed | What to record |
|---|---|---|---|
| Baseline | None | Dose, water, grind, temperature, time, stir | Sourness, sweetness, body, finish |
| Test 1 | One small step finer | Everything else | Taste and pressing resistance |
| Test 2 | 15–30 seconds longer | Use the better grind result | Taste and clarity |
| Test 3 | Small temperature increase | Dose, water, grind and time | Taste after safe cooling |
Quick checklist before changing the recipe
- The coffee and water were weighed or measured consistently.
- The grounds were level and completely wetted.
- The paper filter and cap were installed correctly.
- The brewer was placed on a sturdy mug.
- The press used gentle, constant pressure rather than force.
- Only one variable changed from the previous cup.
- The coffee was tasted at more than one temperature.
The takeaway
For sour AeroPress coffee, begin with a repeatable upright recipe and a medium-fine grind. If the cup is both sour and thin, move slightly finer first, then test a little more contact time or heat one at a time. Do not assume natural fruit acidity is a defect, do not use ratio alone as an extraction fix, and do not adopt the inverted method without recognizing the manufacturer’s burn warning.